Tutorial
Welcome to the orientation, recruit! This page is sure to get you up to speed on the latest and greatest in terminal graphics with chafa.py! Please read on and don’t forget to have some fun ❤️
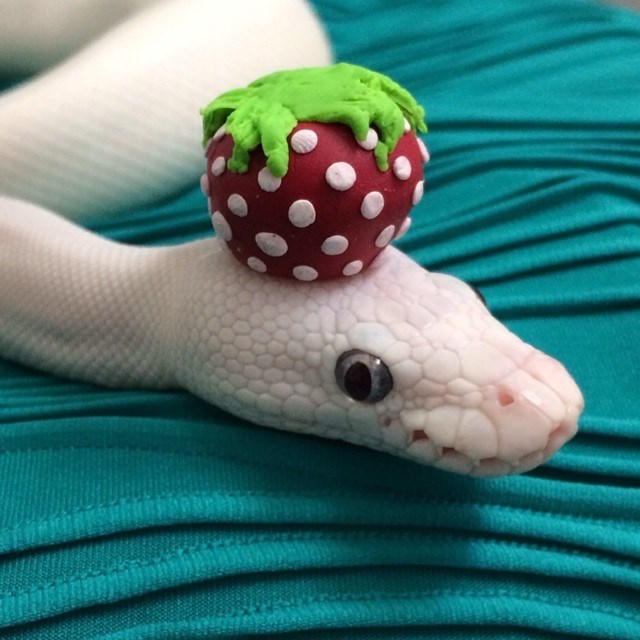
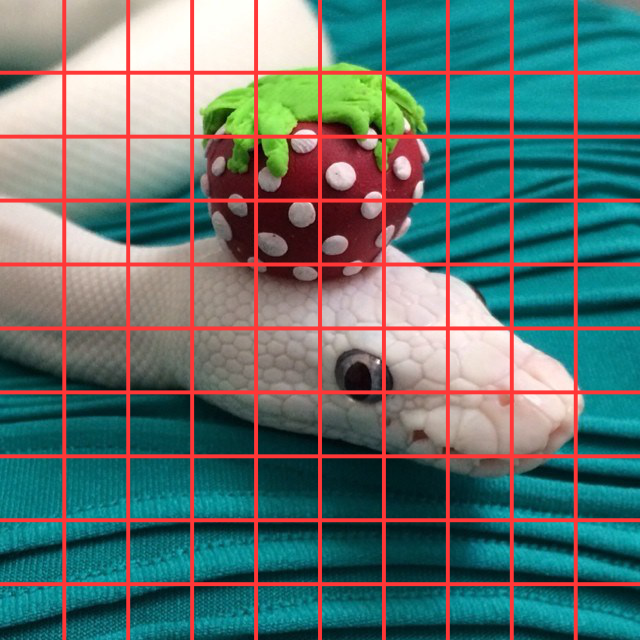
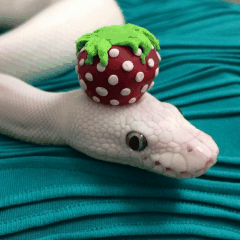
This tutorial will be using the following image of a snake (./snake.jpg) in all examples. It has dimensions 640x640.
Drawing an image
There are several steps to drawing an image. These are (hopefully) fairly straight forward once you get your mind around them.
Creating a canvas
To output an image in the terminal, you first need Canvas. The canvas is an object that functions like an actual canvas for the artist (chafa) to draw to!
Before we make a canvas, we need to configure it. This is done by creating a CanvasConfig and changing it’s properties:
import chafa

config = chafa.CanvasConfig()

config.height = 10
config.width  = 10
Now, when we create a Canvas with the above CanvasConfig, it will have width and height of 10 character cells in the terminal. This will of course affect the resolution of our image.
Think of the artist having a canvas that is covered in a 10x10 grid. The artist then has to pick, for each of the 100 available cells, a character, a background color and a foreground color. They can’t divide the cells down further.
How would you pick a character and colors for each of these cells?
You can also think of it like a monitor. A monitor with a smaller resolution will have worse, well, resolution!
After configuring our CanvasConfig, we can create a Canvas for drawing on:
canvas = chafa.Canvas(config)
Loading an image
Now that we have a Canvas, we need to draw to it. The chafa.py library includes a loader.Loader class to help with loading images for using with chafa.
from chafa.loader import Loader

image = Loader("./snake.jpg")
The loader.Loader automatically notes down the image’s dimensions, calculates the images rowstride (the width of the image * the number of channels) and determines which PixelType to use.
print(image.width, image.height)
print(image.rowstride)
print(image.pixel_type)
You can also get the pixel data for the image from loader.Loader.get_pixels().
You do not need to use the included loader.Loader class to load images. Check out the Examples if you are curious about some other libraries that can be used!
Drawing to the canvas
To draw the loaded image to our canvas, we use Canvas.draw_all_pixels(). This is by far the most complicated function of this library in the terms of required parameters, but don’t worry, they are easily filled out by using our loader.Loader.
canvas.draw_all_pixels(
    image.pixel_type,
    image.get_pixels(),
    image.width, image.height,
    image.rowstride
)
The Canvas.draw_all_pixels() expects the src_pixels array to be a 1 dimensional array where each 3 (or 4 entries if your image has an alpha channel) represent the RGB values (RGBA values) of each pixel. To tell chafa which order these 3 (or 4) values come in, you need to specify the correct PixelType.
Once drawing is complete, we can get the string representation of our image with Canvas.print().
output = canvas.print().decode()

print(output)
The output of our program
Here is the full program we have so far:
import chafa
from chafa.loader import Loader

# Create config
config = chafa.CanvasConfig()

config.height = 10
config.width  = 10

# Create canvas
canvas = chafa.Canvas(config)

# Load the image
image = Loader("./snake.jpg")

print(image.width, image.height)
print(image.rowstride)
print(image.pixel_type)

# Draw to the canvas
canvas.draw_all_pixels(
    image.pixel_type,
    image.get_pixels(),
    image.width, image.height,
    image.rowstride
)

# print output
output = canvas.print().decode()

print(output)
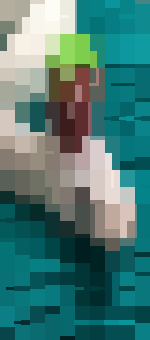
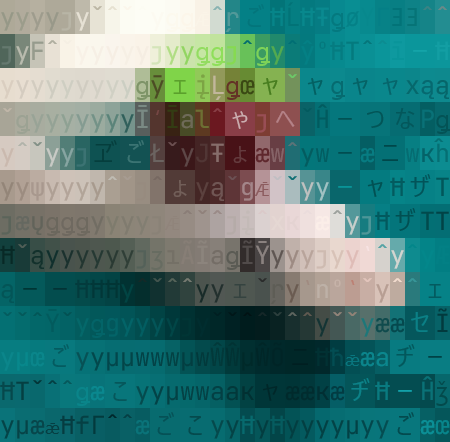
My image is not square?!
As you may have noticed, the output we got does not have the same aspect ratio as our original image. It’s wayyyyy too tall. As it turns out, the character cells in our terminals are not necessarily perfectly square and chafa is oblivious to this. Thankfully there is an easy fix!
Calculating canvas geometry
Before we create our canvas, but after we load our image, we can use CanvasConfig.calc_canvas_geometry() to calculate the width and height of our canvas based on the image’s dimensions and our font ratio.
What is the font ratio you ask? Well it’s nothing more than the width of the font divided by the height of the font your terminal is using. For instance, if you are using JetBrains Mono, each character cell in the terminal is about 11 pixels wide and 24 pixels high. The font ratio would then be 11/24 ≈ 0.45833...
The CanvasConfig.calc_canvas_geometry() uses the height and width of the config as a sort of bounding box so the calculated canvas geometry will not exceed those dimensions.
We will also make our canvas a little bigger to get a higher resolution image.
config.width  = 30
config.height = 30

config.calc_canvas_geometry(
    image.width,
    image.height,
    11/24
)
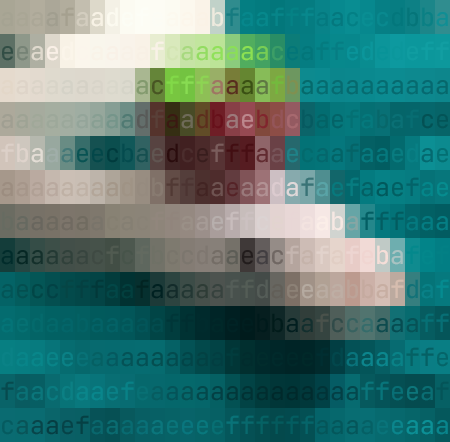
If we then print our image as before, we will get
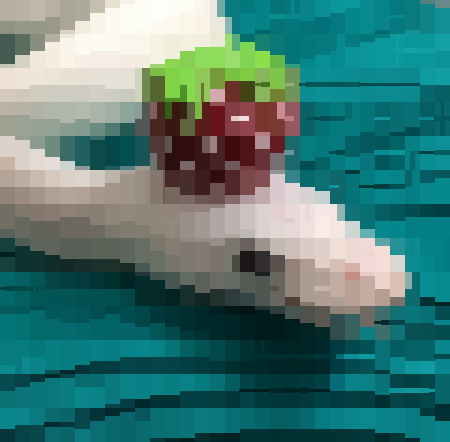
This is a much better 🐍!
Kitty and Sixels
Chafa also has support for the Kitty and Sixels terminal image protocols. These will allow you to output images with perfect resolution in terminals which support them.
Here is the starting point of our program:
import chafa
from chafa.loader import Loader

FONT_HEIGHT = 24
FONT_WIDTH  = 11

# Create config
config = chafa.CanvasConfig()

# Set geometry
config.height = 20
config.width  = 20

# Load image
image = Loader("./snake.jpg")
Kitty
To output images using the Kitty image protocol, we just need to set the pixel mode to PixelMode.CHAFA_PIXEL_MODE_KITTY before creating our canvas:
config.pixel_mode = chafa.PixelMode.CHAFA_PIXEL_MODE_KITTY

config.calc_canvas_geometry(
    image.width,
    image.height,
    11/24
)

canvas = canvas(config)
Next we draw the image with Canvas.draw_all_pixels() as above. We then print the image as usual:
output = canvas.print()

print(output.decode())
The output should look something like this
Wait… what’s with the grainy pixels?
Astute students may have noticed that the output looks pretty, well, blocky. This is because chafa does not actually know how big each character cell in our terminal is in pixels. To get a better output, we need to tell our config about that. Before we create our canvas, we can configure our cell geometry like so:
config.cell_width  = 11
config.cell_height = 24
These values will depend on which font you are using for your terminal emulator. These are based on JetBrains Mono. After setting these our output will look something like this:

Wow!
Sixels
Drawing with sixels is easier than with kitty. You will not need to use CanvasConfig.calc_canvas_geometry() or set the cell geometry. We can simply set the pixel mode to PixelMode.CHAFA_PIXEL_MODE_SIXELS:
config.pixel_mode = chafa.PixelMode.CHAFA_PIXEL_MODE_SIXELS

canvas = canvas(config)
Next we draw the image with Canvas.draw_all_pixels() as above. We then print the image as usual:
output = canvas.print()

print(output.decode())
The output will look something like this:
Sixels are pretty cool!
I don’t get any output from print!?
If you are trying to print an image using kitty or sixel sequences but you don’t get any output, your terminal is probably not being detected correctly by TermDb.detect(). Don’t worry, you can still use Sixel or kitty output. You just have to add these control sequences to your terminal info. There are two ways of doing this.
Let’s say you have already created a TermInfo by some means (maybe using TermDb.detect()). You can get a “fallback terminal info” which includes fallback sequences for kitty and sixels and supplement your terminal info with those:
# Create fallback info
term_db       = TermDb()
fallback_info = term_db.get_fallback_info()

# Create a term_info (you should probably use term_db.detect())
term_info = TermInfo()

# Supplement with fallback info
term_info.supplement(fallback_info)
You can then pass this term_info to Canvas.print():
canvas.print(term_info = term_info)
Instead of creating this term_info yourself, you can pass the optional fallback parameter to Canvas.print():
canvas.print(fallback=True)
which will have the same effect as creating a term info with TermDb.detect(), supplementing it with fallback information and then passing it to Canvas.print().
Using symbol maps
The SymbolMap specifies which symbols are available to chafa when drawing an image. The symbol map is only relevant if you are using the PixelMode.CHAFA_PIXEL_MODE_SYMBOLS.
Here is the start of the program we will be using in this section:
import chafa
from chafa.loader import Loader

config = CanvasConfig()

image = Loader("./snake.jpg")
Adding symbols
The first method of adding symbols to our symbol map will be by SymbolTags. Each symbol tag represents a group of symbols to make it easy to access big categories of symbols. We can add these to our map by using SymbolMap.add_by_tags():
symbol_map = SymbolMap()

symbol_map.add_by_tags(chafa.SymbolTags.CHAFA_SYMBOL_TAG_ALPHA)
We can then assign this symbol map to our config with CanvasConfig.set_symbol_map():
config.set_symbol_map(symbol_map)
When we draw the image to the canvas and print it (as is explained above) we will get something like this:
A very alpha snake.
Next up, we can add symbols by range with SymbolMap.add_by_range(). Let’s say the first character of our range is a and our last character is f. Then all the characters a,b,c,d,e,f will be added to the symbol map:
symbol_map = chafa.SymbolMap()
symbol_map.add_by_range("a", "f")
We then assign the symbol map to our config and print the image:
This is very hard to make out.
The last way to add tags to the symbol map is via SymbolMap.apply_selectors(). This allows you to quickly add and remove parts of symbol tags. For example: block,border sets map to contain symbols matching either of those tags. +block,border-dot,stipple adds block and border symbols then removes dot and stipple symbols:
symbol_map = chafa.SymbolMap()
symbol_map.apply_selectors("+block,border-dot,stipple")
Assigning the symbol map to our config and printing the image will yield:

Selectors are pretty useful
Removing symbols
Removing symbols is just as simple as adding them, just use SymbolMap.remove_by_tags() or SymbolMap.remove_by_range(). If you want to remove with selectors, just use SymbolMap.apply_selectors() with your selectors string being something that starts with - like -block,-stipple.
Inspecting the canvas
You can use indexing to inspect a Canvas! This can be useful if you want to get one row or column of the image or if you want to edit the colors in a certain block of the image. The indexing is done in y,x order to mimic a 2 dimensional array of pixels.
Attention
If the pixel mode is not set to PixelMode.CHAFA_PIXEL_MODE_SYMBOLS, inspecting the canvas in this way will yield no results.
Here is the starting program for this section:
import chafa
from chafa.loader import Loader

FONT_RATIO = 11/24

# init config
config = chafa.CanvasConfig()

config.height = 15
config.width  = 15

# Load image and init canvas
image = Loader("./snake.jpg")

# Set symbol map for visibility
symbol_map = chafa.SymbolMap()
symbol_map.add_by_tags(chafa.SymbolTags.CHAFA_SYMBOL_TAG_HALF)

config.set_symbol_map(symbol_map)

canvas = chafa.Canvas(config)

# Draw to the canvas
canvas.draw_all_pixels(
    image.pixel_type,
    image.get_pixels(),
    image.width, image.height,
    image.rowstride
)
Characters
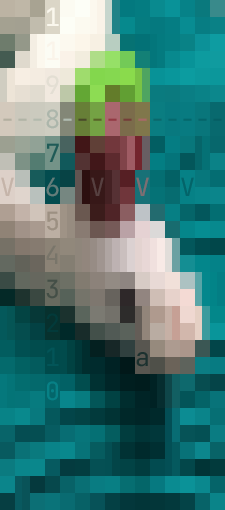
We can inspect characters at position y,x like so:
print(canvas[10,9].char)
We can also set this character as we would expect:
canvas[10,9].char = "a"
print(canvas[10,9].char)
If we print the image we will get something like this:
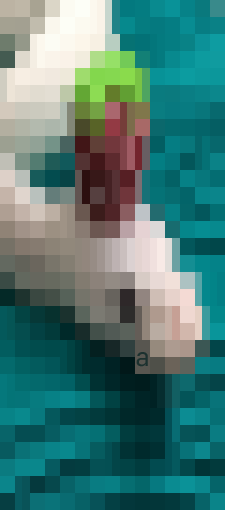
Can you spot the “a”?
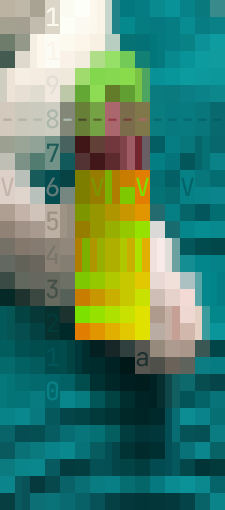
We can, of course, use slicing to set a row/column (or part of a row/column) to characters we desire:
for pixel in canvas[3]:
    pixel.char = "-"

for pixel in canvas[5,::3]:
    pixel.char = "V"

i = 0
for pixel in canvas[:-3:-1, 3]:
    pixel.char = str(i)[0]
    i += 1
This is very useful!
We can do the same thing with the background and foreground colors! The colors expect a tuple (R,G,B) and will return their color in the same format or they will return None if the color is transparent.
for row in canvas[5:-5, 5:-5]:
    for pixel in row:
        pixel.bg_color = (25 * pixel.x, 25 * pixel.y, 0)
        pixel.fg_color = (25 * pixel.y, 25 * pixel.x, 0)
Ok, now this is getting ridiculous!
I need more help!
If you are still stuck, don’t worry! Hop over to the discussions on GitHub and ask your questions there! I will try to be as helpful as I can and get you up and running!